|
|
Sizes and Materials List …
|
|
| Size: | Any size depending on measurements |
| Hook(s): | To match selected yarn |
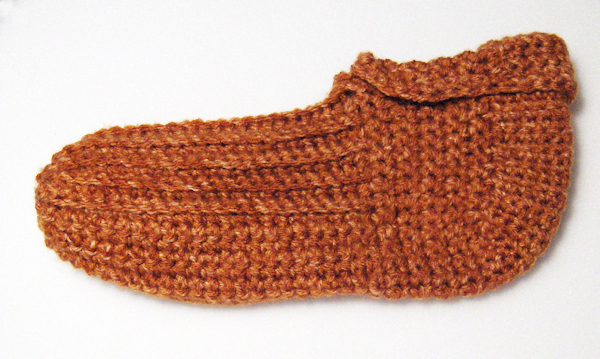
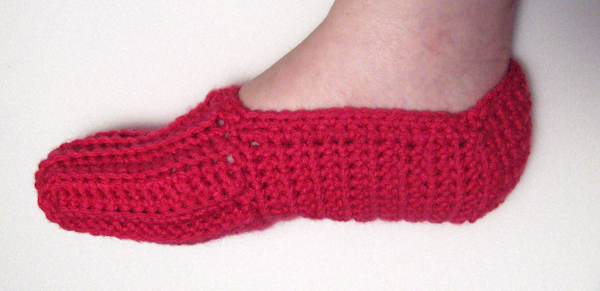
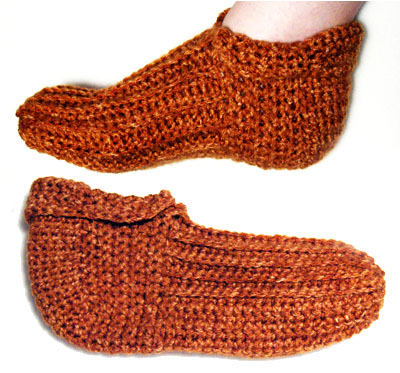
| Yarn: | Use any yarn, remembering that using thinner yarns will take more time. Brown sample uses Vanna’s Choice by Lion Brand. Pink sample uses Bernat Worsted. |
| Colors & Approx. Yardage: |
Any color, yardage varies depending on yarn/hook used and size of foot. |
| Notions: | Yarn Needle For optional sole: – Sewing needle – Sewing or embroidery thread – Felt for sole or slip-free fabric – Optional Decorations (see instructions) |
| Gauge: | Not applicable |
 |
|
|
Notes …
|
|
| Misc. Notes |
|
| Measurements | Take the following measurements:
|
| Stitches Used | Each (ea) Beginning (beg) Stitch (st) Chain (ch) Slip Stitch (sl st) Single Crochet (sc) |
| Abbreviations | Loop (lp) Repeat (rep) |
|
Instructions …
|
|
| Top of Foot | |
| Base Chain | Leaving a 18″ tail, crochet a ch long enough to match measurement A, plus 1 ch. |
| Row 1 | Sc in second ch from hook and in each ch across. |
| Row 2 | Ch 1, turn, sc in back lp of each sc across. |
| Row 3+ | Rep row 2 until the width of the piece when stretched matches measurement B. Check the fit if needed by stretching the piece across the top and sides of the foot area where you measured. The ribbing will stretch snuggly over the top of the foot but if you’d like a bit more room around the foot, add one more row.
Keep track of how many rows you make so you can make the same number for the second slipper. Do not fasten off. |
| Fold piece in half along the long side of the piece to find center of short side opposite of the side with the 18” tail. Mark the center. | |
| Toe Base | |
| Row 1 | Ch 1, turn, sc in each sc across. |
| Row 2+ | Rep row 1 until base reaches measurement C ending at opposite corner from beginning tail. Fasten off. |
| Seam Toe & Side | |
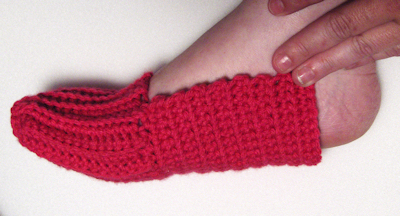
| Thread the beginning tail onto a yarn needle. Starting with 1st row on short side next to the tail, weave yarn through all the row ends. At other end, pull yarn to gather fabric together. If gather is too bulky, refer to note below. Continue sewing long edges of toe piece together. Weave yarn into fabric, cut excess yarn. Turn right side out.
Note: If toe gather is too bulky, pull fabric back to flatten it (toe base should be on the bottom) and stitch seam together along the short side. lay the seam flat with the base on the bottom and stitch the seam together, then Go back across the toe seam and seam up the long side. See completed pink version for an example. |
|
| Sides and Bottom – No Cuff Version | |
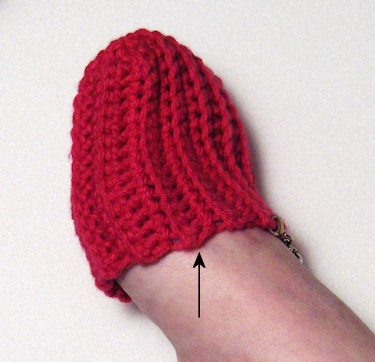
| Row 1 | Join yarn with sc to row end at center mark, sc in each row end around to first sc. Sc in same st as first sc. Do not join.
Alternately, you can lower the sides by starting and ending 2-3 rows from the marked center, as shown by the arrow in the image below. |
|
|
|
| Row 2 | Ch 1, turn, sc in each sc around. |
| Row 3 | Rep row 2 until sides are 1/2″ to 1″ from the back of the heel depending on how much heel you’d like or the size of the slipper, i.e., baby slippers need less room. Proceed to heel section. |
| Sides and Bottom – Cuff Version | |
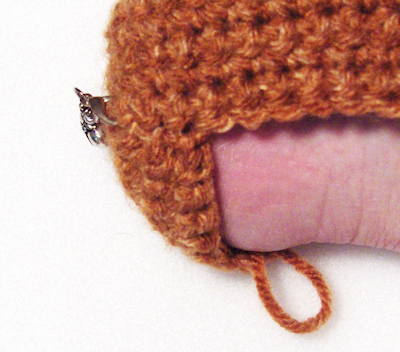
| Row1 | Pick up yarn and ch 3 (for a longer cuff, add additional chs), join yarn with sc to end of row at center mark, sc in end each row around to first sc.
Sc in same st, do not join, ch 4 (if you added chs to the beg of cuff, add the same number of chs here plus 1 ch). As a reference, sample made using ch 3 so it has a very short “elf-like” cuff. |
| Row 2 | Turn, sc in second ch from hook and in each sc around. |
| Row 3-4 | Ch 2, turn, sc in second ch from hook and in each sc around. |
| Row 5 | Ch 1, turn, sc in second ch from hook and in each sc around. |
| Row 6+ | Rep row 5 until sides are 1/2″ to 1″ from the back of the heel depending on how much heel you’d like or the size of the slipper, i.e., baby slippers need less room. Proceed to heel section. |
|
|
|
| Heel – Either Version | |
| Mark heel | Fold slipper in half matching up the sides of the foot base. Find center of heel then count four sts on either side and mark st on each side. |
| Row 1 | Ch 1, turn, sc in ea sc until you reach the second heel marker, sc in marked st, sl st in next sc. Ch 1, turn. |
| Row 2 | Sk sl st, sc in first sc and in next 7 sc to first heel marker, sc in marked st, sl st in next sc (9 sc) Ch 1, turn. |
| Row 3 | Sk sl st, sc in first sc and in next 8 sc across heel, sl st in next sc. Check length against measurement D. |
|
|
|
| Row 4+ | For the cuffed versions, repeat row 3 until heel section reaches just below the ankle.
For no cuff version, continue repeating row 3 until you reach the last row on each side. If you find that you have one extra st on one side as you get near the top of the heel, when you join to the last st on the opposite side, ch1, turn, and sc in each sc across, join in last st of other side and continue to edging. |
| Cuff – Snug Version | |
| Rep row 3 until all sc of sides are worked into. Proceed to edging.
If you find that you have one extra st on one side as you get near the top of the heel, when you join to the last st on the opposite side, ch1, turn, and sc in each sc across, join in last st of other side and continue to edging. |
|
| Cuff – Loose Version | |
| Increase row | Ch 1, turn, skip sl st, sc in first sc and in next 3 sc, 2 sc in next sc, sc in next 4 sc across rest of heel, sl st in next unworked sc. Proceed to edging. |
| Next rows | Rep row 3 and increase row until all sc of both sides have been worked into.
If you find that you have one extra st on one side as you get near the top of the heel, when you join to the last st on the opposite side, ch1, turn, and sc in each sc across, join in last st of other side and continue to edging. |
| Edging | |
| Row 1 | Ch 1, turn, sc in first sc and mark this st, sc in each sc and row end around, until you reach marked sc. Sl st in this st to join. Fasten off or continue to row 2. |
| Row 2 (optional) | Repeat row 1 and fasten off. |
| Finishing … | |
| Fasten off, weave in all ends. Block as needed. Try on for fit. | |
|
|
|
| Soles (Optional) | |
|
|
| Optional Decorations | |
|
|
| Wear or give away with pride. Cuffs can be worn up or down depending on your preference.
Soles may wear out before the slipper does. If it does, just replace them with new soles. |
|
| Pattern and photos © Darlisa P. Riggs, CatBird Studios | |