|
|
Sizes and Materials List …
|
|
| Size: |
Not applicable, depends on item purchased. |
| Hook(s): |
Size needed for selected yarn, plus a small steel hook that is small enough to poke through the knitted item but large enough to work with the yarn. Light pink glove sample used a Boye size 4/2.0 mm to attach yarn to glove and Boye size 2/2.25 mm to work the rest. |
| Yarn: |
Any fingering or sock yarn, or crochet thread. Light pink glove sample used Bernat Baby Jacquards in Berries & Cream. Dark pink glove sample used Andey Originals Sock Yarn in Squid-O-Licious. |
| Colors & Approx. Yardage: |
Select a yarn color to match or complement the purchased item. |
|
Notions: |
Yarn Needle |
| Gauge: |
None |
|
|
|
|
Notes … |
|
| Different Edgings |
The edging in this pattern is extremely simple and takes about an hour (or less) to go around the cuff of a glove. If adding edging to a hat or ski band, it will take longer, of course. For a more elaborate edging, pull out your crochet books, like the Harmony Guides, and find a nice edging to use. Check the pattern to see how many sts are needed for each pattern repeat, then make sure that your round 1 has the necessary scs to make the selected edging. When working round 1, if the edge of the piece flares out too much, replace round 1 with the following: Attach yarn to smaller hook with a slip knot, push hook through the cuff of the gloves in one of the troughs of the ribbing. Yo, pull loop through cuff, yo, pull through both loops on hook, sc made. *Ch 2, sk next “trough,” sc in next trough,* repeat from * to * around, join with sl st to first sc. |
| Stitches Used |
Chain (ch) |
| Reader Tip | Reader Pat Baucom sent me an e-mail saying that she’d made several of these gloves for Christmas using eyelash and other textured yarns for the added trim. She also made matching scarves to go with them and they were all a big hit. Double the giving pleasure! |
|
Instructions … |
|
|
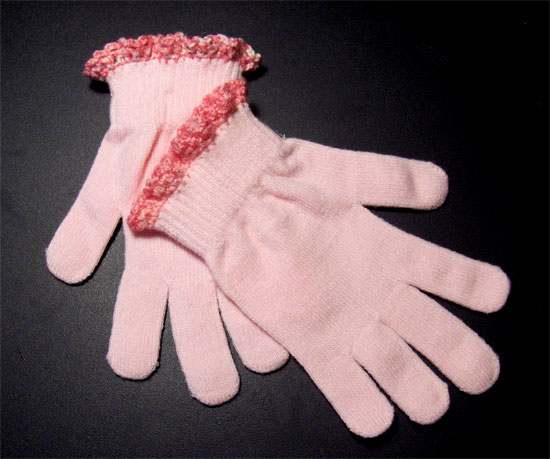
Glove Cuff – Light Pink Version |
|
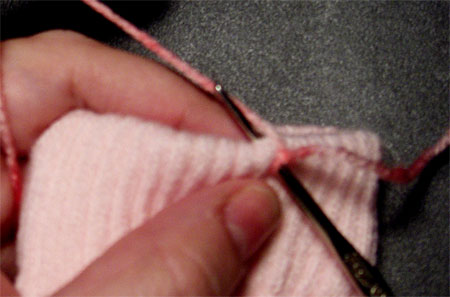
| Round 1 | Attach yarn to smaller hook with a slip knot, push hook through the cuff of the gloves in one of the troughs of the ribbing. |
|
|
|
| Yo, pull loop through cuff, yo, pull through both loops on hook, sc made. | |
|
|
|
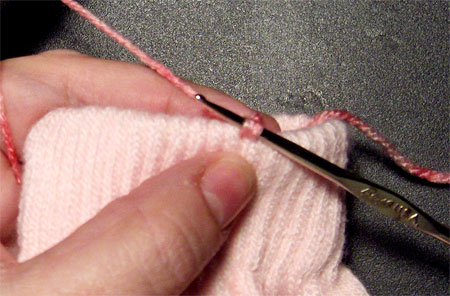
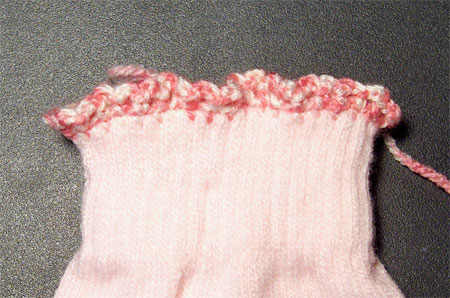
| *Ch 1, sc in next trough of ribbing,* repeat from * to * around ending with a ch 1, sl st in beg sc. | |
|
|
|
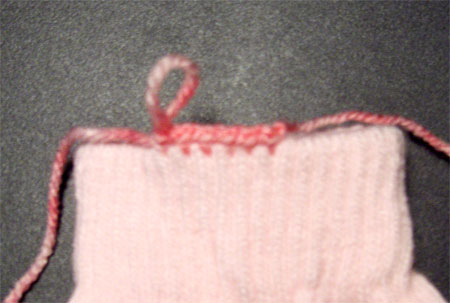
| Round 1 should look similar to the image below: | |
|
|
|
|
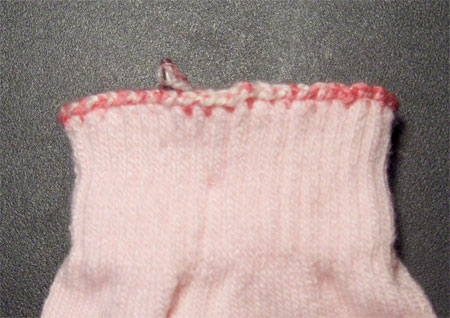
Round 2 |
*Ch 3, sk next sc, sc in next sc,* repeat from * to * around ending with ch 3, sl st in joining sl st. |
|
|
|
| Round 3 |
Ch 1, sc in first ch 3 loop, *ch 3, sc in next ch 3 loop,* repeat from * to * around ending with ch 3, sl st in joining sl st. Fasten off. |
| Finishing … |
|
|
Weave in ends. |
|
|
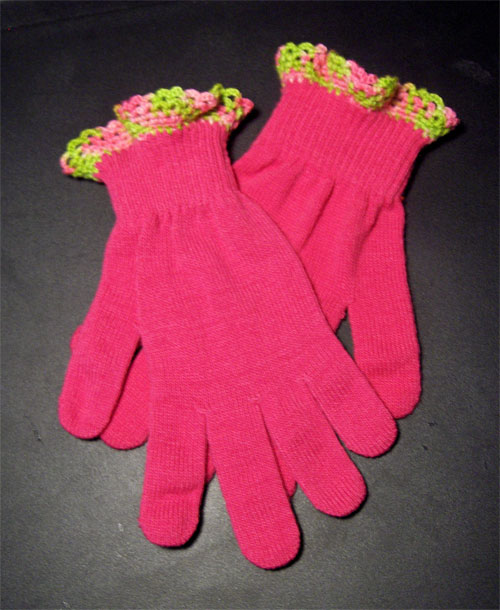
Glove Cuff – Dark Pink Version |
|
| Round 1 |
Follow round 1 instructions from above. |
| Round 2 |
Ch 1, sc in first sc, mark this st, sc in each sc around using the larger hook, join with sl st in first sc. |
| Round 3 |
Ch 2, sk first sc, sc in next sc, *ch 2, sk next sc, sc in next sc,* repeat from * to * around. Do not join. |
| Round 4 |
Ch 3, sc in first ch 2 loop, *ch 3, sc in next ch 2 loop,* repeat from * to * around, mark last sc. Do not join. |
| Round 5 |
Ch 4, sc in first ch 3 loop, *ch 4, sc in next ch 3 loop,* repeat from * to * around. sl st in marked sc. Fasten off. |
|
|
|
|
Finishing … |
|
|
Weave in ends. |
|
| Pattern and photos © Darlisa Riggs, CatBird Studios | |