When learning a new craft, it can sometimes be overwhelming to try and figure out how to start, what techniques to learn, what supplies are needed, etc. Fortunately, there are hundreds of books as well as help on the Internet available to you. I won’t point you towards all these tutorials and books, but I would like to take you through my experiences while learning to dye yarn, along with a few links that I used to get started.
I love learning new crafts, and since joining Ravelry, several of the friends I’ve made there have become involved in spinning and dyeing yarn to use and sell. Of course, buying their yarn just increased my own interest in dyeing yarn (although I’m determined to not learn to spin my own yarn for a very long time).
The easiest way for me to start was to find a kit with a set of dyes, and I found one at Three Irish Girls, along with two PDF tutorials. The dye kit contains eight Jacquard Acid Dyes, and the tutorials provide instructions on dyeing your own yarn at home and dyeing gradiated yarn. The dye kit is $47.50, while the tutorials are $7.99 and $8.99. Although you can find free tutorials on the Internet, knowing that well-established indie dyers wrote these tutorials made me feel more comfortable in following their instructions.
Now to find some undyed yarn: not too expensive, mind you, since I’m just learning, but something with a nice feel and good fiber content. After doing some online research, I settled on the Bare undyed yarns from Knit Picks. I chose two skeins each of the Superwash Merino Wool/Nylon Sock Yarn, the Superwash Merino DK Yarn, and the Superwash Merino Wool/Alpaca/Nylon Sock Yarn. This gave me a variety of content and two weights with which to work.
While waiting for the yarn to arrive, I visited Heindselman’s in Provo, UT and found some undyed Skacel Merino Lace yarn that I could start out with. At home, I soaked the yarn in a large metal bowl with a little detergent and lukewarm water. While waiting, I mixed up the dyes as directed on the jars, set up my work area, and got the stock pot ready with the water and salt. After soaking it for about 45 minutes, I removed the skein from the water and gently squeezed it to remove the excess water.
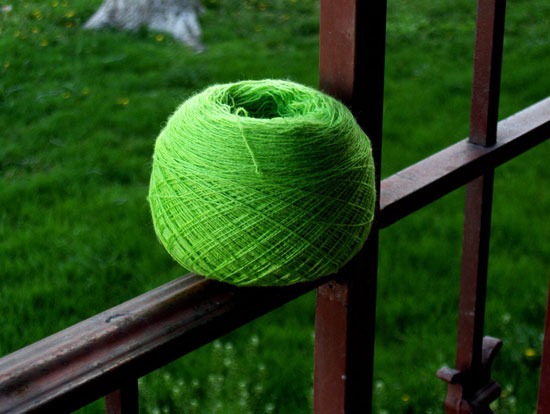
Next, I measured out several teaspoons of the green dye into the dye bath water, adding in a little golden yellow, and placing the yarn into the water, gently squeezing to remove any air bubbles. After turning on the heat, I watched the dye bath closely to see how the color looked on the yarn and adjusted it slightly with more green and yellow. Once the dye bath was clear, I removed the yarn and rinsed it out until the water ran clear, soaking it for about 15 minutes in lukewarm water and detergent. After squeezing out the excess water, I hung the yarn to dry in the bathroom. The next day, the yarn was dry, and I was able to ball it up into a gorgeous cake of my favorite color, which I called Limenoviolet!
Now I was hooked. My Knit Picks order still en route, I visited another of my local yarn shops, the Unraveled Sheep in Sandy, UT, where I also teach monthly crochet classes. A representative from Plymouth Yarns visited Verla, the shop owner, that morning, and she ordered some of their undyed yarn. She had some undyed Trekking sock yarn stashed in the closet, and so I purchased one skein each of the Superwash Wool/Nylon and Superwash Wool/Bamboo.
Once I had returned home, I started looking online for some color “recipes” that I could use. I soon found a blog post on Leigh’s Fiber Journal about getting dye recipes from computer colors. In the article, Leigh shows how she used software programs to get color palettes, inputting the results into an online Dye Mixer. You can also use the dye mixer to manually mix dye colors in order to get the shades that you want, using these results to determine how much of each dye stock solution to use. It’s not perfect, but it gives you a good starting point. With a bit of work, I figured out how much dye I needed for a coral, an olive green, and a golden yellow.
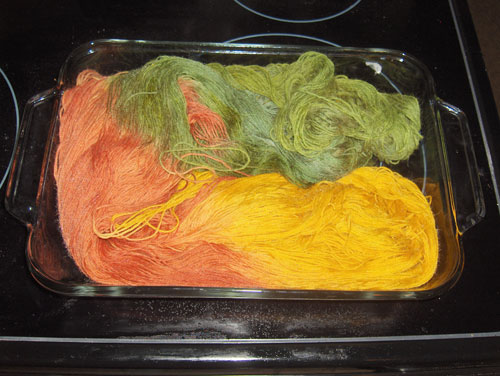
Now that I had the colors I needed, I soaked the yarn in a large metal bowl with a little detergent and lukewarm water. While waiting, I mixed up the dyes using the amounts I’d figured out from the Dye Mixer, then adjusted them as needed to get the colors that I wanted. I placed the dyes into plastic squeeze bottles (the kind used for ketchup and mustard) and moved them to the work area. I decided not to boil the yarn in the dye but to hand paint them instead, so I put out a glass casserole dish to hold the yarn. After the yarn had soaked for about 45 minutes, I removed the skeins and gently squeezed the excess water out.
Next, I placed a section of the yarn in the glass dish and with the yellow dye, squeezed the bottle over the yarn, then gently manipulated the yarn to make sure no white sections were visible, especially on the underside. I let the dye sit for a few minutes, occasionally moving the yarn to make sure the dye saturated each strand. When I was satisfied, I gently squeezed out most of the liquid, drained the dish, and moved the yarn sections down a bit, dyeing this second section with the coral dye, and the final section with the green.
After draining the dish for the third time and rinsing it out, I placed the skeins back in the dish and placed it in the microwave, where I heated it up for two minutes, let it sit for another two minutes, heated it again, cooled it, and heated/cooled for a third time.
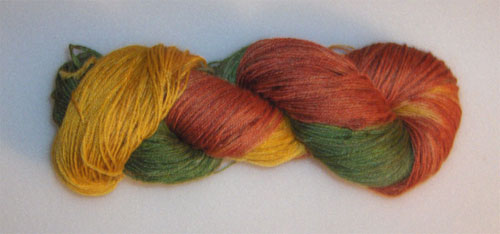
Once the yarn had cooled completely, I rinsed it in lukewarm water until the water ran clear, squeezed out the excess water, and hung the skeins to dry. When the yarn was dried, I first balled up the skeins using my swift and ball winder, then reskeined them on my warping board. My sister said that the yarn looked like mangoes, so the colorway became “Mango Madness.” The skein with the nylon is darker than the one containing the bamboo, but I expected that to happen.
Before re-skeining
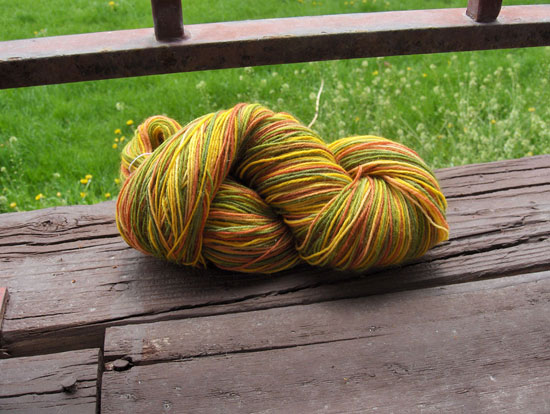
And after re-skeining
Gorgeous, eh?
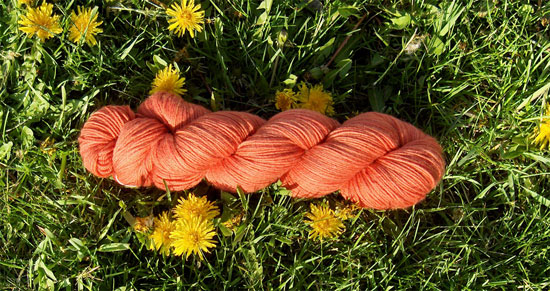
A couple of days later, my box from Knit Picks arrived, and I decided to make another set with three colors, this time using the dye pot instead of the microwave. However, I messed up with the first color, a yellow, when I put a smidge too much black in the mix. The color was too muddy for my liking so I dumped all the yarn into the dye bath and then added several tablespoons of red dye until the color was something that I could live with. I chose red because I felt that it would work best with the yellow dye still in the pot. Fortunately, I was right! Once dry and re-skeined, there were some sections of a light burnt orange where the icky yellow was originally. It now looked very nice with the rest of the orange on the skein. My sister named the color “Lobster Bisque.”
I still have a lot of experimenting to do, but hopefully I’ve shown a little bit of the process from a beginner’s viewpoint, including making something good come out of a mistake. I’ve also been looking at different kinds of dyes and have purchased a book on natural dyeing although I’m not quite ready to try it out yet. Another book I’ve ordered is from PRO Chemical & Dye which has information on color theory and getting 561 shades and colors using their dyes. I hope to order some of their dyes soon since they have more colors, which means less mixing and mistakes on my part. They also have dyes for use with plant fibers and some starter kits.
Future articles will cover my experiments with different colors, dyeing plant fibers (cotton, bamboo, etc.), and using natural dyes. I hope you found this first part interesting and informative.