|
|
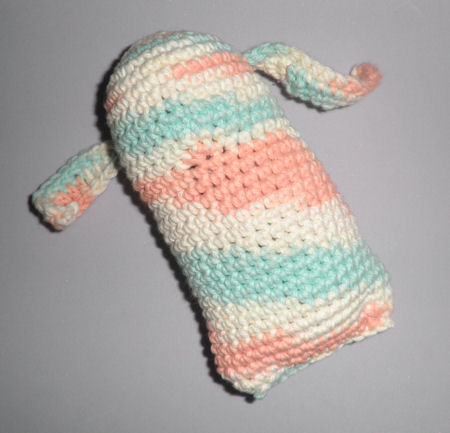
Sizes and Materials List …
|
|
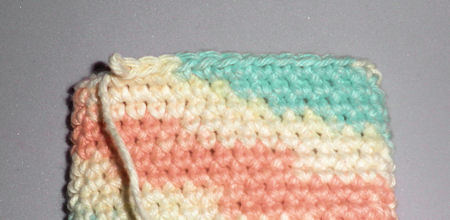
| Size: | Model measures 3″w x 6″ high |
| Hook(s): |
US 7 (4.50 mm) |
| Yarn: | Pisgah Peaches & Creme [100%, 98 yds/2.0 oz ball] |
| Colors & Approx. Yardage |
Any color, 50 yds |
| Notions | Yarn Needle Stitch Markers |
| Gauge: | Gauge not important for this project |
 |
|
|
Notes …
|
|
| Construction |
Worked in the round. Do not join unless specifically instructed to do so. |
| Stitches Used | Chain (ch) Slip Stitch (sl st) Single Crochet (sc) Foundation Single Crochet (fsc) Half-Double Crochet (hdc) Double Crochet (dc) Treble Crochet (trc) |
| Abbreviations |
Each (ea) |
 |
|
|
Instructions …
|
|
| Head and Ears | |
| Round 1 | Using a magic loop, ch 1, 6 sc in loop, do not join. Pull yarn end fairly tightly but do not cut off. Instead, carry the yarn end around as you go crocheting it into the next round. (6 sc) |
| Round 2 |
Pm in last sc of first round, 2 sc in each sc around, moving marker up after last sc, do not join. (12 sc) Note: At the end of round 2, let the yarn end hang free. This can be used to mark the end of the round. |
| Round 3 | Sc in first sc, *2 sc in next sc, sc in next sc,* rep from * to * around. (18 sc) |
| Round 4 | Sc in first two sc, *2 sc in next sc, sc in next two sc,* rep from * to * around. (24 sc) |
| Round 5 | Sc in first three sc, *2 sc in next sc, sc in next three sc,* rep from * to * around. (30 sc) |
| Round 6 | Sc in ea sc around. (30 sc) |
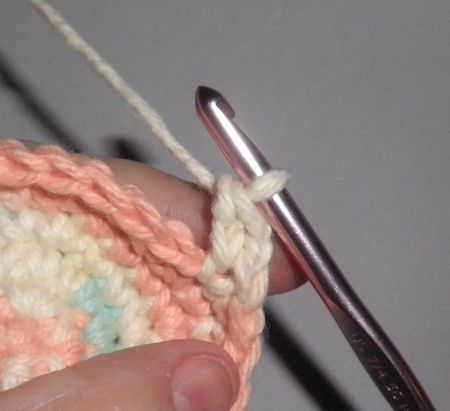
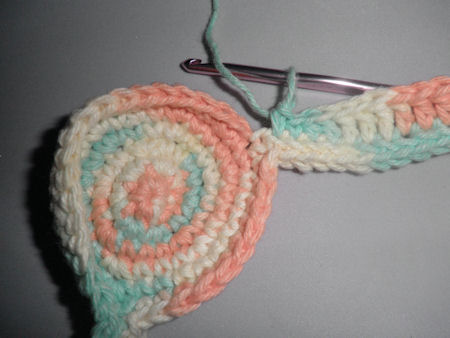
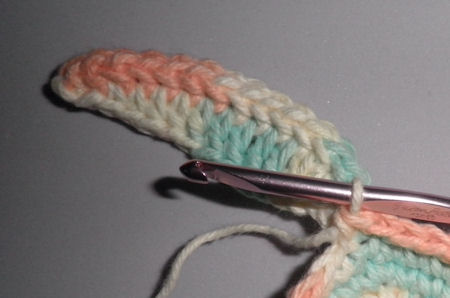
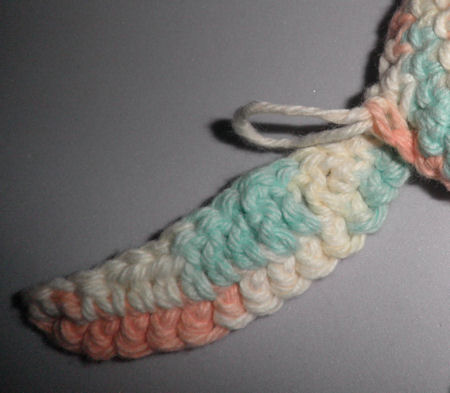
| Round 7 (Ears) | Ea ear is made using a fsc so that the ears are permanently attached to the head. See bottom of pattern for images showing how this is done if you’re having difficulty.
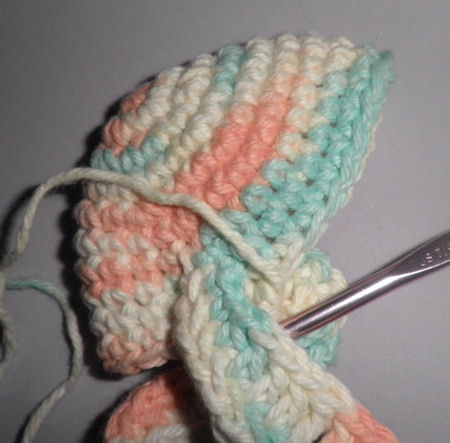
Ear 1: Ch 1, insert hook in side of previous sc, yo, pull through, yo, pull through both lps on hook (first fsc made), make 13 more fsc, ch 1, sl st in bottom of last fsc, sc in next 2 fsc, hdc in next 2 fsc, dc in next 3 fsc, trc in next fsc, dc in next 2 fsc, hdc in next fsc, sc in last 2 fsc, sc in original sc on head. Sc in next 10 sc. Rep Ear 1 instructions for Ear 2, sc in ea sc around to first ear. |
| Round 8 | Sc in the same st where the ear starts to go up, make sure ear is in front of hook and sc in next sc at base of other side of ear (you may need to do the sc by inserting the hook from behind instead of from the front), sc around to next ear, sc in same st where ear starts to go up, make sure ear is in front of hook and sc in next sc at base of other side of ear, sc around. |
| Round 9 (Nose) | Fold piece in half with the ears lining up and mark the front center for nose placement.
Sc in ea sc around to marked st, 2 sc in marked st, sc around to beg. |
| Rounds 10-11 | Sc in ea sc around |
| Round 12 | Sc in ea sc around until you get to nose, sc3tog, sc around to beg. |
| Body | |
| Round 13 | Fold piece in half and mark the two side sts. Use the ears as nose location to determine where to fold it.
Two sc in first sc, sc around to marked st, 2 sc in marked st, sc around back to the beg. |
| Round 14 | Rep round 13. |
| Rounds 15-28 | Sc in ea sc around. At end of round 28, sl st in next sc. |
|
Base |
|
| Round 1 | Fold piece in half to check and mark the location of ea side.
Sc around to second st from marked st, sc3tog, sc around to second st from next marked st, sc3tog. |
| Round 2 | Sc in ea sc to next side, sc2tog, sc around to next side, sc2tog. |
| Round 3 | Sc in ea sc around, fasten off leaving an 18″ tail. |
|
Finishing … |
|
|
Stuff inside of piece with polyfil or fabric scraps. If wanted, add some crinkly plastic and/or a piece of leather (if your dog loves leather) in the center. Pack as tightly or as loosely as you want to. Using the 18″ tail, sew the edges together, fasten off tightly then run the strand into the piece, then pull out and cut off making sure end is pulled inside.
|
|
| Making the Ears (Rounds 7 & 8) | |
|
Ch 1, insert hook into the same sc … |
|
|
Yo, pull through, yo, pull through both lps on hook (first fsc made). Rep 13 times. (14 fsc) |
|
|
Ch 1, sl st in bottom of last fsc … |
|
|
Sc in next 2 fsc, hdc in next 2 fsc, dc in next 3 fsc, trc in next fsc, dc in next 2 fsc, hdc in next fsc, sc in last 2 fsc …
|
|
|
Sc in original sc on head – this is the same sc you started the ear with. |
|
|
Sc in next 10 sc. Rep Ear 1 instructions for Ear 2, sc in ea sc around to first ear. Sc in the same st where the ear starts to go up, make sure ear is in front of hook and sc in next sc at base of other side of ear (you may need to do the sc by inserting the hook from behind instead of from the front). |
|
|
Sc around to next ear, sc in same st where ear starts to go up, make sure ear is in front of hook and sc in next sc at base of other side of ear, sc around. |
|
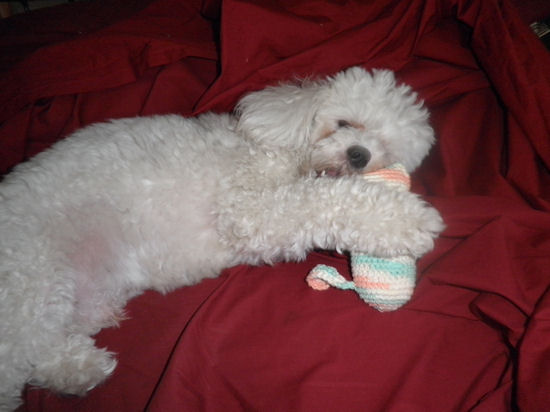
| Pattern and photos © Darlisa Riggs, CatBird Studios Modeled by Mr. Darcy |
|