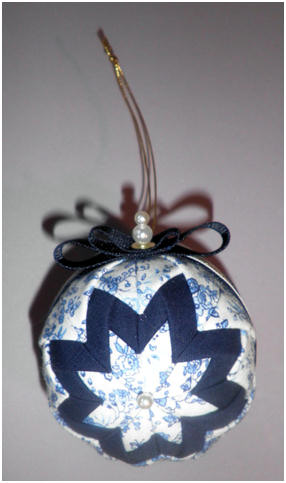
 So, I’m wide awake, it’s 6:30 in the morning and I realize that I forgot to upload the promised “Quilted” Ornaments instructions. These ornaments make up quickly although cutting all the squares does take some time. However, if you have a rotary cutter, they’ll go much faster.
You can find similar instructions around the web, but I’m going to give you special permissions for my version.
- You cannot sell the instructions, printed or electronic.
- You can make the ornaments and sell or give them away.
- You can make up kits and sell them, but the printed instructions must be given free, i.e., free instructions with purchase of kit.
If you make up a kit to give away or sell, I’d suggest the following be included:
- Styrofoam ball
- All fabric squares
- Ribbons
- Sequins
- Beads
- Corsage pins
- Silk pins
- Gold hanging cord
- Scrap ribbon (see instructions for usage)
Adding the silk pins will increase your cost for the kit, but you can also offer a cheaper version without the pins. You can get sets of pins at your local craft store that are in a nice plastic container. The silk pins usually come in a set of 200 pins so I usually buy extra boxes, take off the cardboard hanger and add 20-30 pins to each box for a kit.
When I made up kits, I would make sure to cut extra fabric squares and cut each one into fourths that I would attach to the outside of the kit so my customers could choose their color combinations.
To make up a kit, you will also need the following:
- Brown paper lunch bag
- Zippered plastic sandwich bag
- Staples and stapler
- Black sharpie
To put together a kit:
- Write the kit name on the outside of the lunch bag (alternately, write it on a gummed label and attach the label).
- Place the fabric, ribbons, and cord into the plastic bag and seal, place into the paper bag.
- Add the corsage pins, beads, and sequins to the box of silk pins.
- Place the pin container and styrofoam ball into bag.
- Fold top of bag over a couple of times, place the small squares of fabric that match the kit fabric on the folded part of the bag and staple closed.
- Print up copies of the instructions and staple together. When a customer purchases a kit, give them the instructions separately
You’re now ready to make your own ornaments or whatever! Click on the PDF icon below to download the file.
![]()