|
|
Sizes and Materials List …
|
|
| Size: |
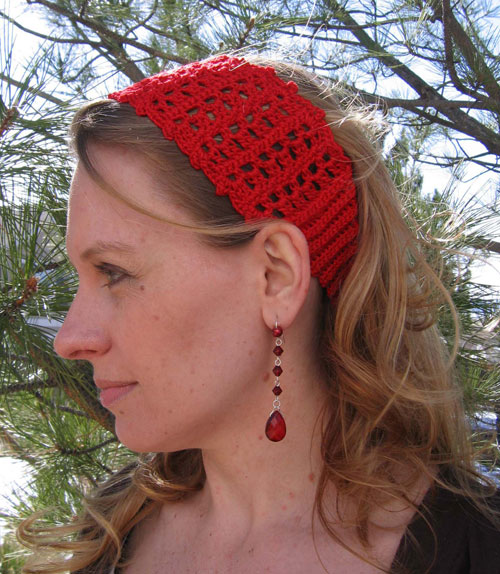
One size, to fit average teen/adult (approx. 3” wide by 19” circumference (unstretched), stretches up to 23” circumference) |
| Hook(s): |
US D/3 (3.25 mm) or size needed to obtain gauge. |
| Yarn: |
Pisgah Yarn & Dyeing Co., Inc. Art. 2029 “Super PetalSpun” [100% rayon, 150 yds/3 oz. ball] or any soft, lightweight rayon thread (somewhat thinner than size 5 cotton thread) or similar wt. thread or yarn that works to gauge |
| Colors & Approx. Yardage: |
#1 Red, 75 yds |
|
Notions: |
Yarn Needle |
| Gauge: | 24 sc and 24 rows = 4”/10 cm Always take time to check your gauge |
|
Notes …
|
|
| Pattern |
|
| Stitches Used |
Chain (ch) |
| Abbreviations |
Back Loop Only (blo) |
|
Instructions …
|
|
| First Half of Center Back Narrow Band | |
| Base Chain |
Ch 8. |
|
Row 1 |
Sc in 2nd ch from hk and in ea ch across. (7 sc) |
| Rows 2-10 |
Ch 1, turn, sc in blo of ea sc across. Working the back loops creates the ribbing section. |
| Begin increases | |
| Row 11 |
Ch 1, turn, working in blo, work 2 sc in first sc, sc in ea sc across to last sc, 2 sc in last sc (9 sc) |
| Row 12 |
Ch 1, turn, sc in blo of ea sc across. |
| Row 13 |
Rep row 11. (11 sc) |
| Row 14 |
Rep row 12. |
| Row 15 | Rep row 11. (13 sc) |
| Row 16 | Rep row 12. |
| Row 17 | Rep row 11. (15 sc) |
| Row 18 | Rep row 12. |
| Row 19 | Rep row 11. (17 sc) |
| Row 20 | Rep row 12. |
| Begin lace pattern | |
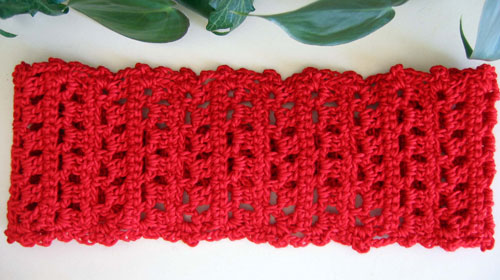
| Row 21 | Ch 3, turn, dc in second sc, i.e., the next sc after the sc at base of beg ch, *ch 1, sk next sc, dc in next 2 sc,* rep from * to * across. (12 dc, 5 ch-1 sps) |
| Row 22 | Ch 1, turn, sc in ea dc and ch-1 sp across. (17 sc) |
| Row 23 | Ch 3, turn, sk first sc at base of beg ch-3, sk next sc, sc in next sc, *ch 3, sk 2 sc, sc in next sc,* rep from * to * three times, ch 3, sk next sc, sc in last sc. (6 ch-3 sps) |
| Row 24 | Ch 3, turn, dc in first ch-3 sp, *ch 1, 2 dc in next ch-3 sp,* rep from * to * across. (12 dc, 5 ch-1 sps) |
| Rows 25-63 | Rep rows 22-24 until a total of 43 lace pattern rows have been worked, ending with row 24. |
 |
|
| Second Half of Center Back Narrow Band | |
| Begin decreases | |
| Row 64 | Ch 1, turn, sc in ea dc and ch-1 sp across. (17 sc) |
| Row 65 | Ch 1, turn, working in blo, sc first 2 sc tog, sc in ea sc across to last 2 sc, sc last 2 sc tog. (15 sc) |
| Row 66 | Ch 1, turn, sc in blo of ea sc across. |
| Row 67 | Rep Row 65. (13 sc) |
| Row 68 | Rep row 66. |
| Row 69 | Rep row 65. (11 sc) |
| Row 70 | Rep row 66. |
| Row 71 | Rep row 65. (9 sc) |
| Row 72 | Rep row 66. |
| Row 73 | Rep row 65. (7 sc) |
| Rows 74-83 | Rep row 66. |
| Finishing … |
|
| Fasten off, leaving an 18” tail for sewing. | |
| Picot Edging | |
| Working along side of center lace pattern section, join thread in end of last sc row before start of lace section.
Ch 1, sc in same st, *ch 4, in end of next ch-3 sp row work (sc, ch 3, sc)(picot completed),* rep from * to * across to last row of lace section, ending with ch 4, sc in first sc row at end of lace section. Fasten off. Repeat picot edging on other edge of headband. |
|
| Join Center Back Seam | |
| Fold headband in half so that the narrow ends meet making sure there is no twist in the piece. Holding narrow ends together, whipstitch through both thicknesses to sew seam using the 18″ tail remaining from the second half of the band. | |
| Finishing … | |
|
Weave in all tails.
|
|
| Pattern and photos © Kathy North, Designs by KN Modeled by Cecily North |
|


