|
|
Sizes and Materials List … |
|
| Size: |
Adult, approx. 7″ around |
|
Supplies: |
|
| Tools: | Bead needle, if not supplied with the bead cord Bent-nose pliers Chain-nose pliers |
|
|
|
|
Notes … |
|
| Hints: |
|
| Recommended Brands: |
|
|
Instructions … |
|
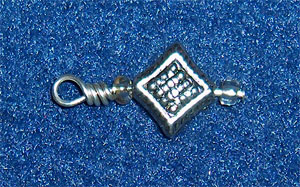
| Make the Charm Dangle | |
| The charm dangle is used to mark where you start each row set. If you do not want a charm dangle, skip to the next section. If you are using a charm that has an attached ring, skip to the next section as well. | |
| Step 1 | Thread one of the seed beads on to the head pin, then the charm/bead, then the second seed bead. |
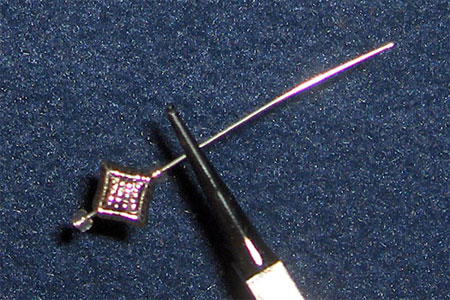
| Step 2 | Place the round-nose pliers about 3/16″ above the top seed bead.
|
| Step 3 |
With your fingers or the flat-nosed pliers, wrap the wire of the head pin around the top of the pliers and down the side as shown below. |
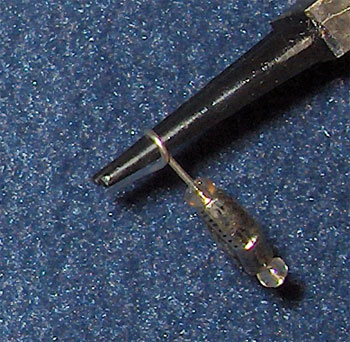
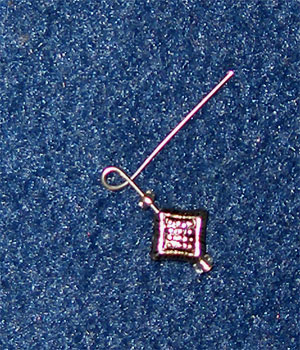
| Step 4 |
Continue wrapping the end of the wire over the straight section of wire and around the back until there is only a small section of wire left. use the chain-nose pliers to press the end down so that it will not catch on yarn or clothing. Your charm dangle is now complete. Set it aside until needed to finish the bracelet. |
| String the Beads | |
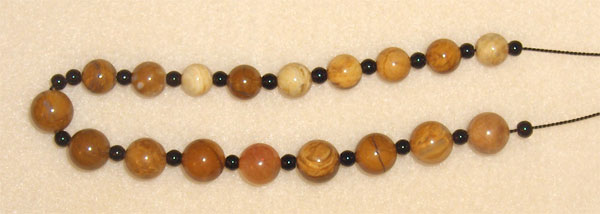
| Step 1 | Begin stringing the beads starting with a small divider bead, then a 10 mm stone, small bead, 10 mm stone, etc., until you have nine stones and 10 beads on the cord. A small bead should be at both ends. |
 |
|
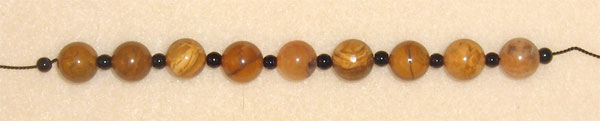
| Step 2 | String another small bead so that there are two next to each other, then add an 8 mm stone, small bead, 8 mm stone, etc., until you have nine 8 mm stones and 10 beads with a small bead at the very end. |
 |
|
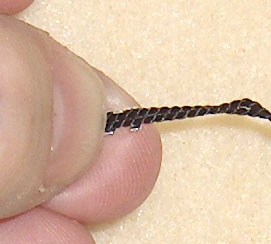
| Step 3 | If using the carded bead cord, move the beads all the way to the end of the cord, completely unwrapping the cord from the card in order to do so. You want to leave the rest of the cord with the needle still attached for your next bracelet. |
| Step 4 | Measure the cord so that it is twice the bracelet length needed plus 0.25″ and cut at that length. The extra quarter inch is used to place in the connectors or as trimming if a mistake is made while gluing into the connectors. (Rewrap the remaining cord around the card to keep it from tangling before you can make your next bracelet.) |
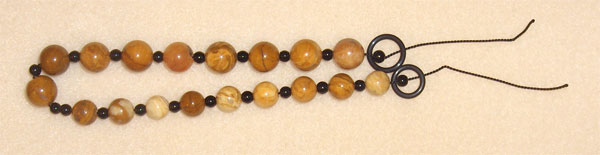
| Step 5 | Slip the o-rings over the ends of the cord making sure that the larger o-ring is next to the 10 mm stones and the smaller o-ring is next to the 8 mm stones. |
 |
|
| Add the Connectors | |
| Step 6 (Skip this step if using cord ends) |
If using cord coil connectors, place a drop or two of glue inside the coil, hold the cut ends of the cord together, and push them at least 0.25″ inside the coil. Hold in place for about five seconds then place it gently down on your worksurface. Allow to dry completely before continuing. Skip to step 12. |
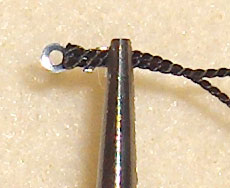
| Step 7 |
If using cord end connectors, hold the cut edges together and place into a connector between the tabs. Make sure that the end of the cords are slightly higher than the top tab. Hold the ends tightly against the connector between two fingers.
|
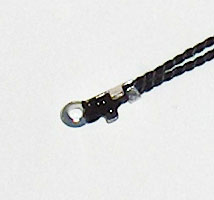
| Step 8 | Using the chain-nose pliers, fold the bottom tab of the connector over both cords. Press tightly on the pliers to ensure it is tight against the cords.
|
| Step 9 |
Place a drop of glue on the end of the cord making sure the glue covers the entire cord above the bottom tab.
|
| Step 10 |
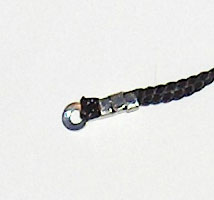
Wait a few seconds then, with the chain-nose pliers, fold the remaining two tabs down tightly over the cord. Make sure to keep your fingers away from the wet glue. If needed, hold the end of the connector with the flat-nose or the bent-nose pliers.
Once the glue is dry, you can safely trim any cord ends that will interfere with placing the split rings through the connector opening. |
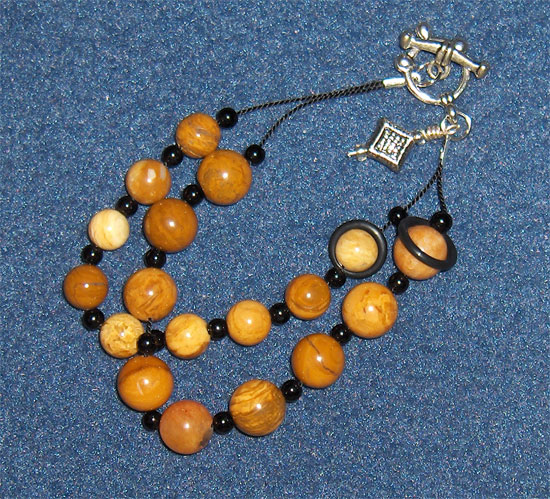
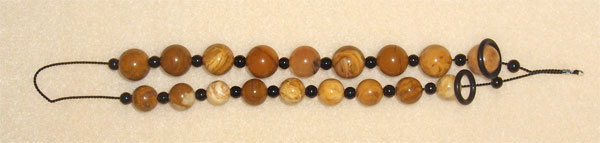
| Step 11 | Fold the bracelet in half and move the 10 mm stones to one side and the 8 mm stones to the other. Make sure that each side has a small bead at the end. Do not cut the cord as leaving it intact will make it easier to place inside the connector and will also keep the cord stronger. |
 |
|
| Step 12 (Skip this step if using cord ends) |
If using cord coil connectors, place a drop or two of glue inside the coil, pinch the looped end of the cord together, and push it at least 0.25″ inside the coil. Hold in place for about five seconds then place it gently down on your worksurface. Allow to dry completely before continuing. |
| Step 13 | If using cord end connectors, pinch the looped end of the cord together and place it into the second connector following steps 7 through 10. Allow glue to dry completely before continuing. |
 |
|
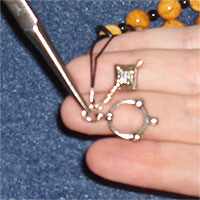
| Attach Clasp and Charm Dangle | |
| Step 14 |
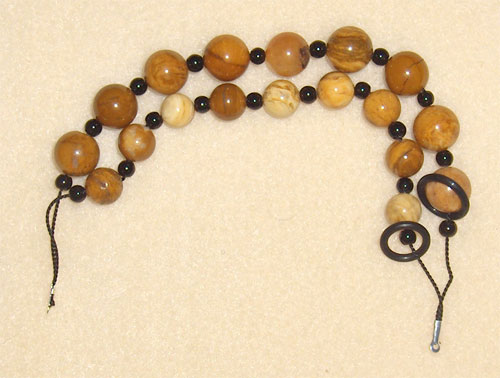
Using the bent-nose and chain-nose pliers, open one of the jump or split rings. Continue holding the ring with one of the pliers and thread the ring openings of the bracelet connector (the one nearest the o-rings), the charm dangle, and the round section of the toggle clasp or the lobster clasp, depending on which type of clasp you are using. Use the two pliers to close the split ring making sure the opening is as small as possible especially if using the cord ends as the ring is very thin.
|
| Step 15a |
If using a toggle clasp, repeat step 14 on the other end of bracelet to attach toggle section of clasp only. |
| Step 15b |
If using a lobster clasp, only attach the other end of the bracelet to the split ring. The lobster clasp will attach to the split ring to close the bracelet. |
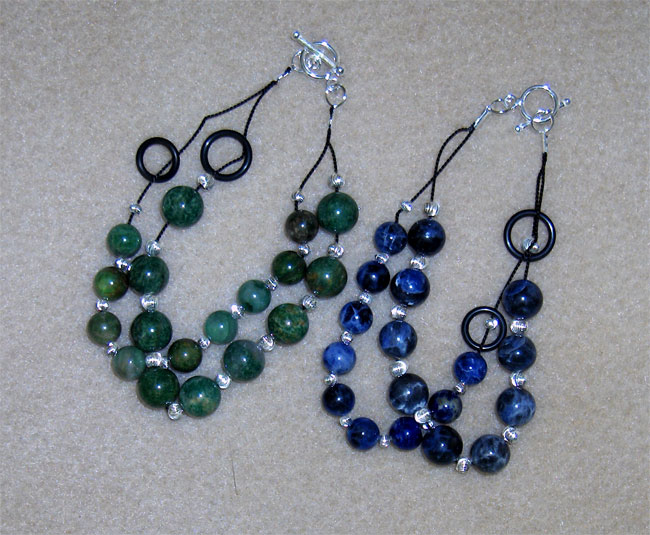 Two row counter bracelets without the charm dangle Stones used are African Jade and Sodalite with sterling silver beads and clasps |
|
| Necklace Variation | To make this a necklace instead of a bracelet:
|
| Usage … |
|
|
Row Counter Bracelets can be used to count up to 99 rows of crochet or knitting. It can also be used to count rows for weaving and calories consumed.
Variation: If you don’t like moving the o-rings back to the beginning at the end of every 10th row, leave it at the end and move it back towards the beginning for the second set. You’ll need to remember which direction you are heading in in order to not lose count. For example, if the large o-ring is after an even numbered stone or next to the charm, then you are moving from the beginning of the bracelet towards the end on the smaller stones. If the large o-ring is after an odd numbered stone, then you are moving from the end of the bracelet towards the charm on the smaller stones. |
|
| Tutorial and photos © Darlisa P. Riggs, CatBird Studios You are more than welcome to sell or give away any bracelets or necklaces you make using this tutorial. Just make up your own usage instructions to include with them (or point them to this tutorial). |
|