|
|
Sizes and Materials List …
|
|
| Size: | 12″ l x 2″ w |
| Hook(s): |
US I/9 (5.50 mm) |
| Yarn: | Wolle’s Yarn Creations Color Changing Cotton CCC 3 [Cotton, 480 yds, 100 g skein/ball] |
| Colors & Approx. Yardage |
Summer Fruit, 160 yds Any size crochet thread will work as long as you adjust the fsc row |
| Notions | Yarn Needle Elastic Head Band, such as the Goody Ouchless Thin Elastic Headwraps – make sure you get the round or the thinnest flat one you can find |
| Gauge: | Gauge is not important for this project. Increase or decrease in groups of 5 fsc. |
 |
|
|
Notes …
|
|
| Using a different edging pattern |
You can use just about any crochet edging pattern to make your own headband as long as the edging has a base chain row. You then have two options: 1. Make the base ch then crochet around the band as shown in round 2, side 1 making sure you insert the hk into the back lp only of the base ch. 2. Instead of making the base ch, make an fsc base ch and crochet around the band as shown in round 2, side 1. Please note that the base ch needs to be long enough so you cover all but 2″-4″ of the unstretched elastic band, depending on how much of the band you want to cover. It might be helpful to measure across the top of your head from ear tip to ear tip and just make sure the base fsc is close to that measurement. Repeat for this pattern is 4 fsc for ea rep plus 1 fsc. |
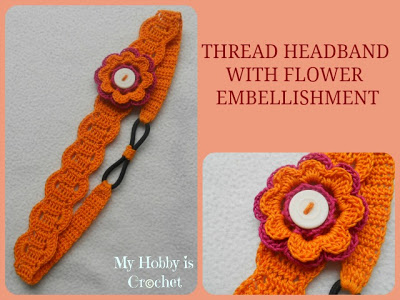
| Alternate Headband Construction | If you prefer a headband where the crochet part is not made around an elastic headband but only has a smaller elastic ponytail holder at the ends, click on the image below for a free pattern from “My Hobby is Crochet.” Image and link used with permission.
 |
| Stitches Used | Chain (ch) Slip Stitch (sl st) Single Crochet (sc) Foundation Single Crochet (fsc) Double Crochet (dc) |
| Abbreviations |
Hook (hk) |
|
Instructions …
|
|
| Headband | |
| Round 1, Side 2 | Fsc 65. |
| Round 1, Side 1 | Ch 1, turn, place first fsc ch below the elastic band, to the left of the metal connector (or wherever ends of band are joind), *bring hk to front of band and insert into first fsc ch making sure you insert the hk under the top lps and the center lp – if you don’t, the bottom sts will be too long – and under the elastic band, yo, pull through lps and band on hk, yo, pull through both lps on hk, rep from * across. (65 sc) |
| Round 2, Side 1 only | Ch 1, turn, sc in ea sc across. (65 sc) |
| Round 3 | Ch 1, turn, sl st in first sc on side 1, ch 4 (beg dc, ch 1), sk second ch, dc in third ch, *ch 1, sk next sc, dc in next sc,* rep from * to * to end of side 1, ch 2, dc into sc below the sc you just worked into (the one next to the band), ch 2, dc into sc next to other side of the band, ch 2,* dc into top of dc on side 2, rep from * to * to end of side 2 and around corner, joining with sl st in top of beg dc. (64 ch-1 sps, 6 ch-2 sps) |
| Round 4 | Turn, sk dc you just joined into, *8 dc in next dc, sl st in next dc,* rep from * around both sides, joining with sl st in first dc of side 1. Fasten off. |
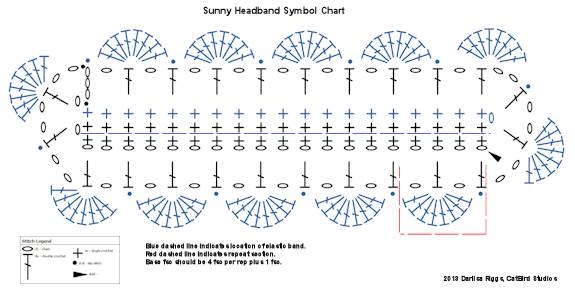 Download PDF version of chart. Print on 8.5″x11″ paper. Chart made using the Crochet Charts software made by Stitch Works Software. |
|
|
Finishing … |
|
| Weave in ends. | |
 |
|
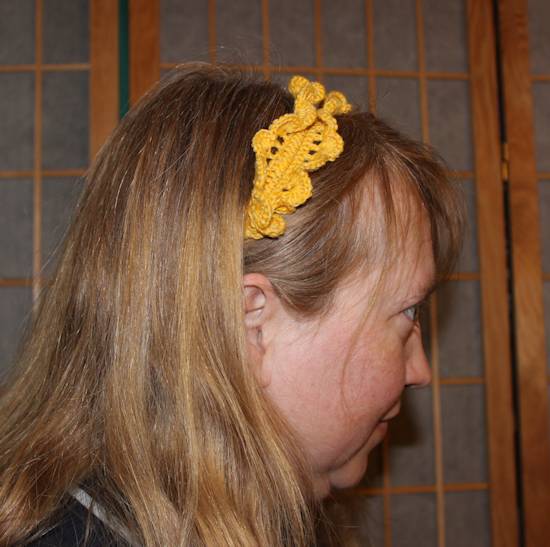
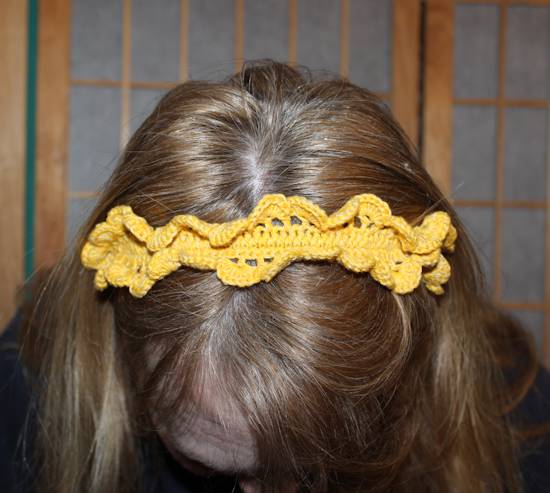
| Pattern and photos © Darlisa Riggs, CatBird Studios, except for image from My Hobby is Crochet Modeled by Jenny Riggs-Lippincott |
|