|
|
Sizes and Materials List …
|
|
| Size: |
Size varies depending upon yarn used & number of felting cycles. |
| Needle(s): |
10.5 (6.5 mm), 24 inch cable |
| Yarn: |
Hobby Lobby I Love This Wool! [93% Wool, 7% polyamide, 219 yds/100 g skein] |
| Colors & Approx. Yardage: |
Light Olive #175, approx 110 yds |
|
Notions: |
Yarn Needle |
| Gauge: | 16 sts and 22 rows = 4”/10 cm Always take time to check your gauge |
|
|
|
|
Notes …
|
|
| Working Pattern |
|
 |
|
| Stitches Used |
Cast on (CO) |
| Abbreviations | Approximately (approx) Beginning (beg) Stitch(es) (st / sts) Together (tog) |
| Special Stitches | I-cord Circular knitting using magic loop technique (or DPNs can be used) |
|
Instructions …
|
|
| Purse | |
| Round 1 |
CO 6 sts and join. |
|
Round 2 |
Kfb in ea st around (12 sts) |
| Round 3 |
[Kfb, K 1] around. (18 sts) |
| Round 4 | [Kfb, K 2] around (24 sts) |
| Round 5 | [Kfb, K 3] around.. (30 sts) |
| Round 6 | [Kfb, K 4] around. (36 sts) |
| Round 7 | [Kfb, K 5] around. (42 sts) |
| Round 8 | [Kfb, K 6] around. (48 sts) |
| Rounds 9-14 | Place marker at beg and K around. (48 sts) |
| Round 15 | [K2tog , K 6] around. (42 sts) |
| Round 16 | K around. (42 sts) |
| Round 17 | [K2tog , K 5] around. (36 sts) |
| Rounds 18-20 | K around. (36 sts) |
| Round 21 | [K2tog , K 16] twice. (34 sts) |
| Rounds 22-26 | K around. Do not finish off, continue to the handles section. (34 sts) |
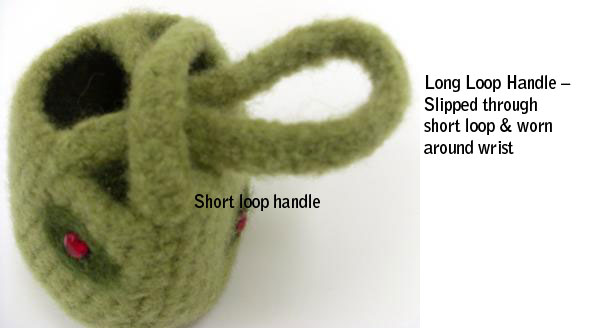
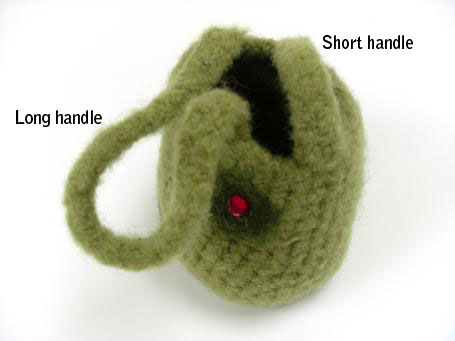
| Short Loop Handle | |
|
Starting from the end of Rnd 26: Bind off 6 sts, place 3 sts on st holder, bind off 5 sts, place next 3 sts on st holder, bind off 6 sts ,place 3 sts on st holder, bind off 5 sts, with last 3 sts, begin working I-cord handle. Work in I-cord for 5 inches. Finish off & using a large tapestry needle, attach cord to next set of 3 sts on st holder. Weave in and trim ends. |
|
| Long Loop Handle | |
|
Join yarn to next set of 3 sts & work in I-cord for 10 ½ inches. Attach to final set of 3 live sts by sewing as in short handle instructions. Weave in and trim ends. |
|
 |
|
| Finishing … |
|
|
Weave in all ends. Felt the purse by washing in hot water and rinsing in cold. Include detergent and a couple of towels to the felting wash. Warning: Do not use light colored towels with dark colored yarns as they may add unwanted lint to your project. Check progress frequently. Purse may need additional washes to achieve desired results. |
|
| Blocking … | |
| When felting is complete, check purse opening and handle size. These parts can be stretched a little, while drying, if the opening is too tight for your hand to reach into the purse and/or if the purse handle cannot slip over your hand. | |
| In order to obtain a rounded shape, block the piece by inflating a balloon inside of the purse. Manipulate the purse, by pulling the piece into shape, to ensure an oval shape for the olive purse or a more spherical shape if making the earth version. Let dry before removing the balloon. | |
| Embellishments … | |
| Models are embellished by various means. The main original olive design is needle felted onto the machine felted and blocked purse. Please see below for basic instructions for needle felting as well as other suggestions. Refer to the notions listing above for the materials and tools needed. | |
| Notes | The needles are tiny and sharp, please be careful! Additionally, make certain the foam is thick enough sothat you don’t damage the table or needles when you start the process. |
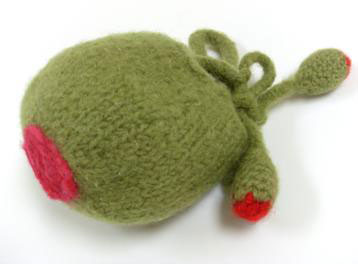 Knitted version with needle felted pimento and crocheted olive bolo tie (crochet instructions for bolo tie below) |
|
| Additional Embellishments … | |
| Glam it up – glue sequins or plastic crystals onto the felted olive for a sparkly look.
Need MORE glam? – make entire olives out of sequins by gluing strands of green sequins in an oval design. Finish off with a pretty crystal pimento. 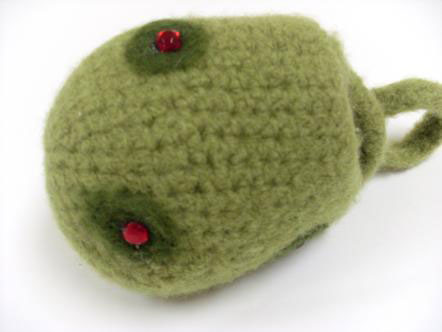 Needle felted olive with glued crystal pimentos Need a feminine bag to take to a wedding, prom, or tea? Pin on your grandmother’s broach and tie a pretty bow onto the short loop handle. Or, instead of the broach, why not hang a charm or a bead or satin tassel, just underneath the bow for a bit of sparkle? 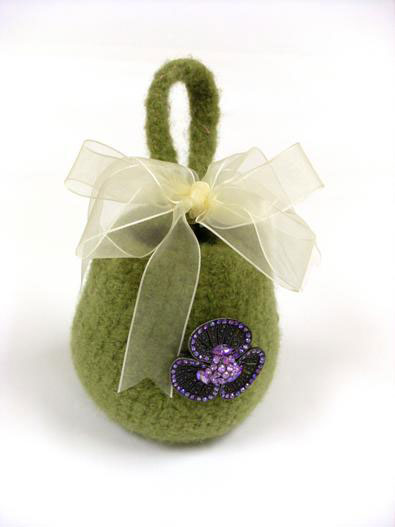 |
|
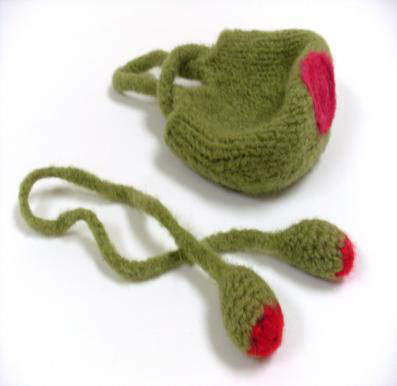
| Olive Bolo Tie – Optional | |
| Round 1 | With red yarn and G hook, sc 6 in adjustable loop, change to green at last st, fastening off red yarn. (6 sts) |
| Round 2 | With green yarn, 2 sc in each sc around. (12 sts) |
| Rounds 3-5 | Sc in each sc around. (12 sts) |
| Round 6 | *Sc2tog, sc in next 4 sts,* repeat from * to * around once. (10 sts) |
| Round 7 | Sc in each sc around. Stuff lightly. (10 sts) |
| Round 8 | Sc2tog around. (5 sts) |
| Round 9 | Sc2tog twice, sc in last sc. Do not fasten off. (3 sts) |
| Strap | Ch 71, working in back bumps of each sc, sc in 2nd ch from hook and in each sc across, sl st into previously made olive and fasten off. |
| Second olive | Make a second olive, minus the chain, and attach to the other end of the strap. |
 |
|
| Finishing … | |
| Weave in all ends & felt in washer as desired. | |
 Tie bolo onto short handle |
|
| Don’t want to make yours an olive? Show your love for our planet. The Mother Earth model was stitched in the usual manner, in blue Lion (worsted weight)Wool, color #178, Dark Teal. Continents were applied by needle felting. I used the free flat map of the world from the following site as a reference: http://www.crayola.com/free-coloring-pages/print/label-the-continents-coloring-page/ Don’t forget to have your continents oriented to the north! Needle felting the world is more time-consuming than it is hard & needle felting is forgiving as you can pull the roving out if you don’t like the results. I felted mine free-hand but if you want to be more precise planning your globe, try sketching the continents with a piece of chalk onto the bag first. Finally, this is a small bag & the earth design is more or less impressionistic, rather than realistic so don’t sweat the process, enjoy it! 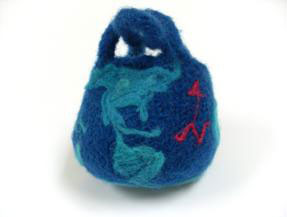 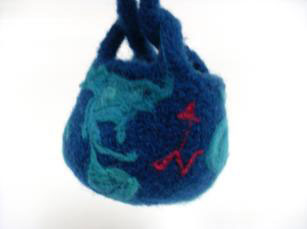 Or just use your imagination? 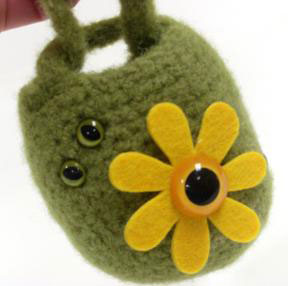 |
|
| Pattern and photos © Nancy Anderson, Yarn Julep Modeled by Maggie Bean |
|